|
|
Code Out Steps
These are the very specific steps you follow when coding out a new site. Make sure every one of these are done. If you don't know how to do any of these steps, bother a veteran techie before you do it so he can show you.
Set up
- Open the emailed code out request, and keep it open during the code out process so you can refer back to it when necessary.
- Make sure the domain(s) are bought. If the code out request says that someone will be purchasing them, send an email to the person it indicates and ask if they have bought them yet. If not, follow up with them to make sure they do asap so you have them ready when you are ready to create the temp CMS'.
- Open the file location of the designs, such as _Law or _Elite.
- Name all of your folders correctly. They are rarely named correctly in the beginning, so make sure they are. If you have never read this how to, read it before you do this step so you understand exactly how to name everything correctly.
-
Copy the incldes folder located at W:\_LAW\_FILLER\_CMS General Files and paste it into your
Web Files folder.
- Organize the files in your design folder. Put all the old/dissapproved versions in a "Disapproved" folder, put all the pictures in a "Pics" folder, put all the logo files in a "Logo" folder and put all the flash files in a "Flash" folder.
- Copy the approved version of the design and paste it, rename it at the end with "-SLICED".
Design Work and Image Creation
- Open your newly created "-SLICED" psd and check the layers and folders. If they are disorganized, forward the code out request email to the designer and ask them kindly to organize it. If they are unavailable and the code out request is urgent, organize the PSD yourself.
- Slice the design. If you are a new coder, get a veteren to check over your slices to make sure everything is good. Once done, save the PSD and close it.
- If the designer hasn't done them already, reply all on the code out request email requesting the designer create the rollovers for the Top Nav and CTA's. If there are any buttons that the designer wouldn't normally know to create a rollover for, make sure you specifically mention that these also need rollovers created as well.
-
While the designer is working on the rollovers, log in to the new CMS creation tool and create your CMS temp site(s). If the projects are not named correctly (named after their domain names), log in to the
Elite Tracker and name the projects appropriately.
- With the rollovers done, open up the design you sliced, and optimize your images for output. This is important. Do not just save them out as jpegs.
-
Save out your images into the Web Files folder. Only save out the images you are going to use, do not save out images you will not actually use in your code or modules. Make sure your output name is named correctly, and your output settings are set correctly. The format for your image names needs to be Geo Target, Practice Area,
seperated by hyphens. If this is too long, then leave out the geo target and just do the practice area. Your output settings should be:
Save as type: HTML and Images, Settings: Bird, Slices: All Slices.
Turn on your rollovers, and repeat the above step for them, but save out within the images folder, so you create an images images folder.
- Open your site files and to into the images folder. Some of your images will always be named incorrectly, so you will need to name these correctly. Copy the image name, minus the number, of one of them, and rename all of the incorrectly names images with this, referring to your photoshop file for the correct slice numbers. Do this for any incorrectly named hover images as well.
Code!
- Time to rock your code! Drill down your dreamweavers folder view to the clients folder in the W drive. Open the Web Files folder. Right click on the Web Files folder, and click New File; this will create a new .html file. Name it Main.html. Open this file.
- Within the Web Files folder, open your includes folder (if you don't have this, do step 5 under Set Up above). Click and hold on the style.css file and drag it into your head tag. Best thing to do is to put it right before your </head> tag and then press enter so the </head> and the stylesheet link you just added are on their own two seperate lines.
- Press F5 to refresh your file, this will link the main.html and the style.css file together so the classes inside the style.css file will show up on your tooltip menu's while coding. (If you do not know what a tooltip menu is, bother a veteran coder so he can show you. This is very important for the speed of your coding.)
-
Set up your body tag. You should have your horizontally repeating slice, background color for and 0 margin set here. The code should look like this:
<body style="background:url(/images/San-Antonio-Sex-01.jpg) repeat-x #54351A; margin:0px">
Some designs that have large left and right BG's will not need horizontally repeating slices. In this case, you would leave out the url(images/San-Antonio-Sex-01.jpg) part.
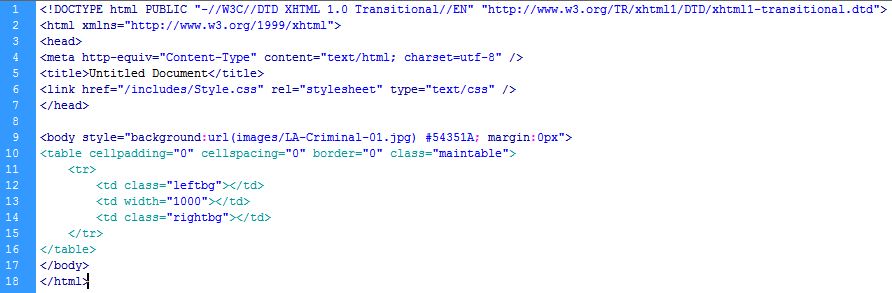
- Add your first table, with a class of maintable on the opening table tag. If the design has left and right bg's, set it up with three cells, first one with a class of leftbg, second with your main area width, third with a class of right bg, as the image shows.
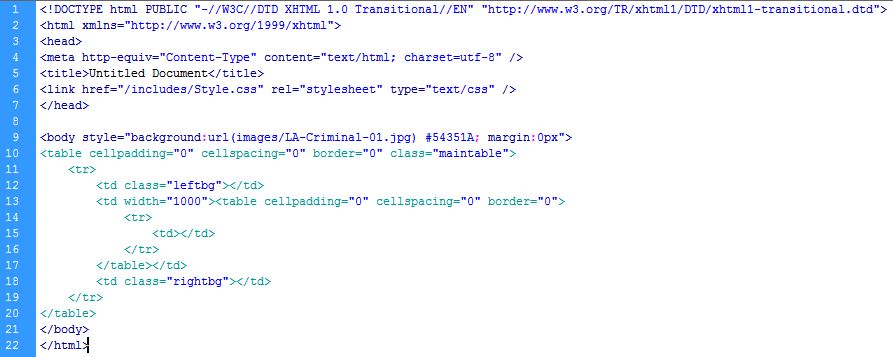
- Add a table within your second td. Indent your outdented lines so the formatting is correct.
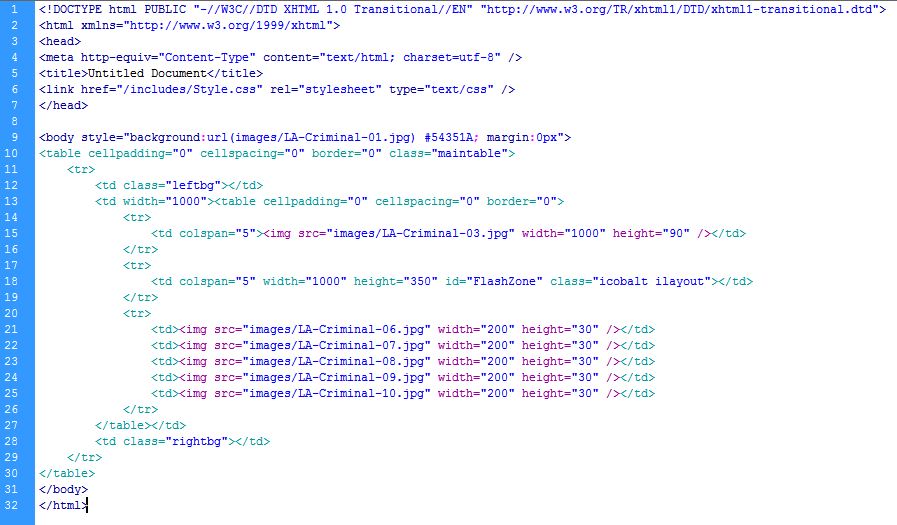
- Code out your top area. Typically, this will start with your masthead image in your first row, your flash area in your second, and the top nav third. Make sure you add a colspan on any rows that need it, with the number set to however many images you have in your top nav.
-
Code out your main area table. Typically, this has three main columns, your left column where your nav goes, middle column where your content goes and right where CTA's go; the example image below will show this type. Sometimes, it will be different, such as only two columns, but the CTA's within the second column. The general idea is, if there is only modules going into a column, you can just throw a zone on that td. If there are modules and other images that should be coded in the layout, add a table inside that columns td and create rows within it for your zone(s) and other images as necessary.
Make sure that on all the main column TD's you assign a width to them!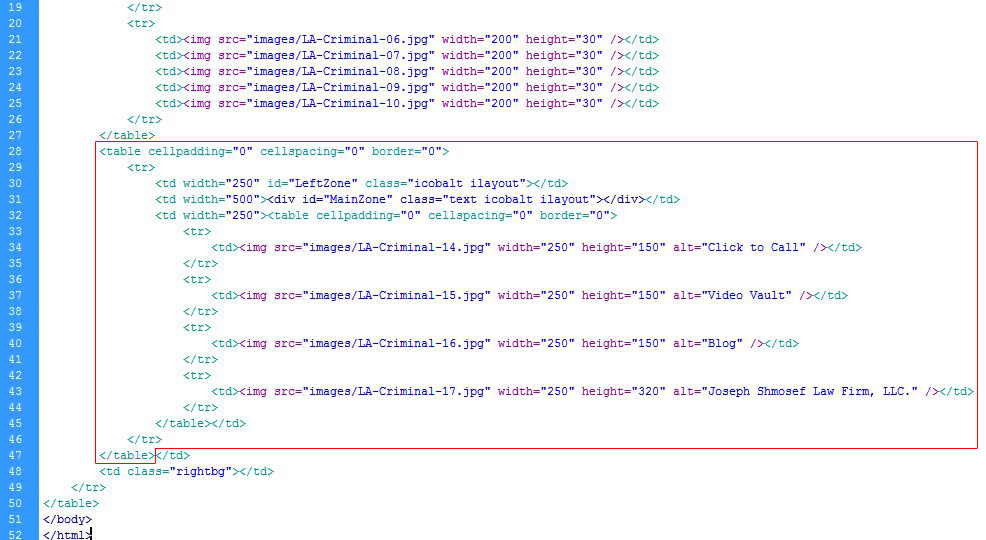
-
Add your bottom image and footer zone. The bottom image is the image near or at the very end of your slices which closes out the whole design, and is rihgt before your footer area. In simpler code outs, this is a simple image that you can just put inside a div, as shown in the image example below.
On more complex code outs, you may have to make it a background image, as the footer will have to lay on top of it, or there will need to be a repeating horizontal slice spanning the entire window behind it, or left and right background images. In these cases, if you are not sure what to do, grab a veteran techie and have him show you.
- Add your alt tags. You can easily do this in Dreamweavers Design view by clicking on the image, and inside the Properties window, add it to the "Alt" field.
- Look over your code and make sure you didn't miss anything. Run through this checklist to double check you have several commonly forgotten elements in place before continuing:
- Did you add your stylesheet link? Is it within the head tag?
- Did you add your horizontal repeating slice on the body tag?
- Did you add margin:0px on the body tag?
- Did you add your window background color on the body tag?
- Did you add a class of maintable on your first table?
- Did you add a width to all your major tables and major column TD's?
- Is your MainZone in a div, rather than in the TD?
- Did you code the left nav header in your layout? If so, remove it. This goes in your left nav module while you are setting it up in the template.
- Did you add your Footer Zone?
Congrats! You're done coding! Now on to the CMS.
CMSing |